Urban Gardening for Beginners
These past few weeks have felt a bit like when I began canning. That is, I can’t imagine why I never did this before. Putting seeds into soil, watching them push their way through, watering, waiting, observing, delighting—it all seems so natural. And easy. Don’t get me wrong, I am well aware that I’m only a couple weeks into this whole thing and I still have a lot ahead of me in the way of challenges and learning and potentially even failure, but choosing to do it has been easy.
Why make the choice to grow your own food? Why not? I can’t think of one instance where creating something myself, doing something with my own hands, hasn’t been more satisfying than taking the “convenient” route. So far, I only have a windowsill full of seedlings and I already feel astonishingly invested in them.
It’s going to be an exciting summer, watching them grow and eventually bear fruit. I keep having daydreams about stepping outside and tearing off a few leaves of kale, plucking a couple tomatoes, and pulling up a radish to make my lunch. Even something as simple as an herb box means that you don’t need to rely on the supermarket’s selection or experience the disappointment when that two-dollar bunch of thyme in your refrigerator goes brown after only a couple sprigs’ use. Of course, my greatest hope is that it all goes so well that I have no choice but to put some of it up at the end of the season. A girl can dream.
So what exactly am I doing? Well, for starters, here’s the list of what I’ll be growing:
- Sheboygan Tomatoes (paste tomatoes great for both eating and canning)
- Mexico Midget Tomatoes (cherry tomatoes)
- Black Beauty Zucchini
- Bushy Cucumbers (good for eating and pickling)
- French Breakfast Radishes
- Lacinato Kale
- Dwarf Blue Curly Kale
- An assortment of herbs: Genovese basil, lemon basil, dill, sage, oregano, thyme, and rosemary
I chose which vegetables I would grow based in part on what knew we’d want to eat and in part on my single-sitting reading of Gayla Trail’s Grow Great Grub: Organic Food from Small Spaces (which I must confess I first learned about here). I can’t recommend this it enough—though if you really, really don’t want to start a garden of some sort, you should avoid even opening this book because it will make you want to grow everything under the face of the sun. I’m not exaggerating here. After I finally put it down, I had to have a very serious conversation with myself about spatial limitations and what it means to be realistic. So I eliminated a few things. Then I gave myself a stern look and narrowed it down to the list above. Yes, that is actually the shortened short list. That’s the power of this book, people.

I’m confident that for the next few months Grow Great Grub will not spend more than a day or two on the bookshelf in any given week. It’s an accessibly-written handbook, loaded with beautiful photographs, on growing pretty much anything in whatever space you have. Whether you only have room for a window box or have an actual plot of land to cultivate, you will find the information useful. Gayla takes you from starting seeds, to fertilizers, to pests and disease, to specific instructions on caring for individual plant types. She also tells you which plants do well when grown together, an element that I found particularly helpful as someone looking to grow a lot in a little space. It’s exactly the book that an eager first-timer with zero knowledge of where to begin (i.e. me) simply must own.
Based on my space, and the fact that I don’t actually own any land, I decided to assemble a container garden. Gayla advocates for repurposing and transforming old containers into planters. I love this and I think it’s a fantastic idea. Unfortunately, apartment living doesn’t really lend itself to keeping a lot of stuff lying around, so I didn’t have anything old waiting for a new use. I made the decision to go out and purchase containers.
If you’re going to buy containers, unless you’re serious about sinking a lot of dough into aesthetics, I’d recommend skipping the brightly colored resin planters and insanely heavy terra cotta pots. They can run you upwards of $50 a piece. For the smaller ones. Personally, it just wasn’t break-the-bank important for me to have pretty planters. So, Chris and I made a Home Depot run and picked up some basic, inexpensive, plastic ones that I am certain will work well.

I ordered my seeds online through the Seed Savers Exchange. Take a look at their selection—it’s fun to browse through all the interesting and unfamiliar varieties of everything and hard to not want to grow one of each. SSE is great, but know that if you select regular shipping your seeds may take a while to arrive (mine did). So if you’re looking to get a garden started soon, you may want to pass on the seed sites/catalogs and pick some up at the store.

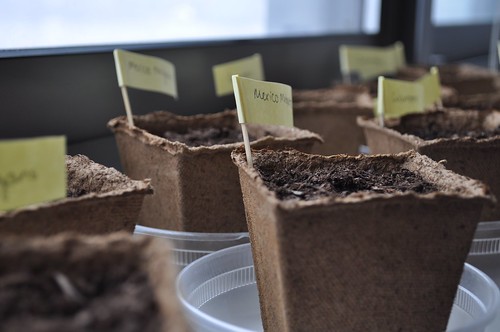
For seed starting, I picked up some of these Burpee fiber pots. They’re cheap and have worked well so far.
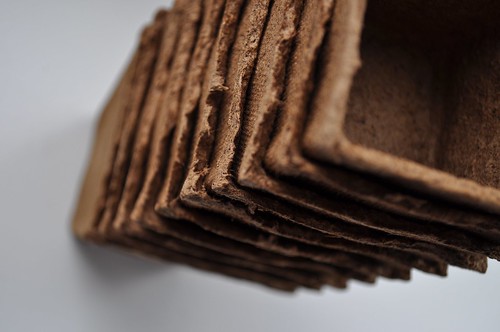
They’re also biodegradable and you’re supposed to be able to transplant your seedlings directly into the soil in the pots themselves. I think I may pass on this, though. A very small amount of powdery white mildew has begun to form on their outsides in the past couple days, which I’ve been able to clear up with a spritz of baking soda and water. Still, I don’t want to risk contaminating the soil when I transplant the seedlings. As draining trays underneath the pots, I used shallow plastic takeout containers and their lids. For flags so that I could identify the seedlings later, I cut standard Post-It notes into thirds and wrapped the sticky end around toothpicks—easy peasy.
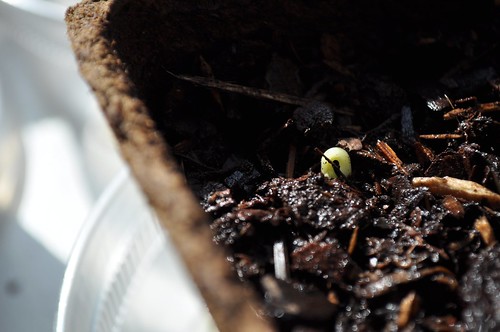
Now, everything I’ve read says that you need to start seeds in a seed starting mixture. I elected not to do this. My seeds still sprouted and they look very healthy so far. That said, I’m going to recommend that you go ahead and buy a bag of seed starting mix. After sowing my seeds I spent six days, until I finally saw something poke through, experiencing acute anxiety over my decision not to use a special mix. I might have even dug up a seed or two or five to make sure that something, anything was happening. You see, seed starting mediums are much lighter than most regular potting soil, which makes it easier for the tender seedlings to do their thing. My soil was mostly loose and light, but also riddled with sticks. The questions loomed: What if they can’t put down roots? What if they can’t make it up through? All valid concerns. All the more reason not to risk it.
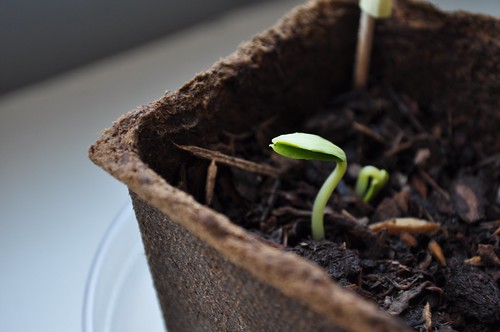
This was my relief on day six:
And this is how that same cucumber sprout looked only a day later (it’s so neat to watch them go from pallid yellow, to bright lime, to deep chlorophyll green):
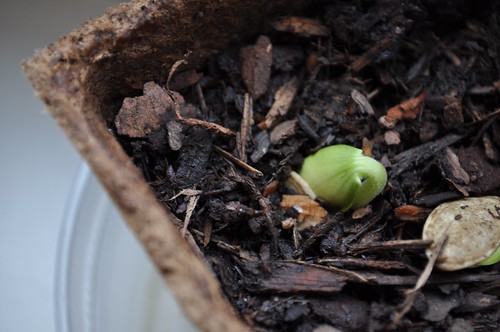
Then came the zucchini:
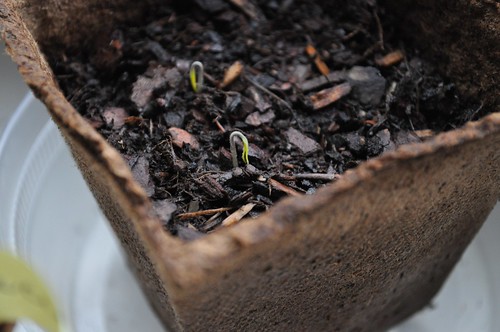
And finally the tomatoes, arching up out of the soil like slender, purple-gray inchworms:
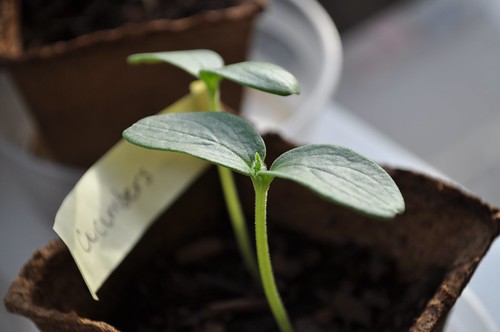
And here they are today, just shy of two weeks after sowing:
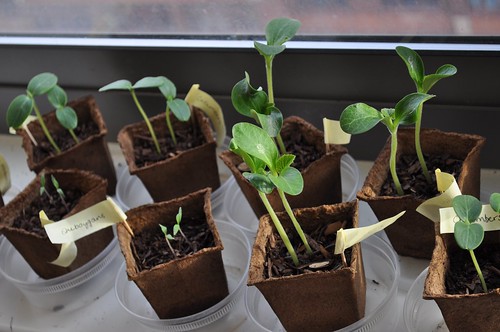
(For those of you that are curious, I planted the kale directly outside–teeny little starts are showing up–and the herbs and radishes will be sown outdoors when I finally set the seedlings out.)
I can hardly wrap my head around how fast it all happened. For days that felt like weeks I was sure they’d never sprout, and now I can hardly keep up. One of my good friends is starting an urban garden as well and is documenting the progress of things here. It’s been fun to compare notes as our plants begin to grow, and I’m just as excited to see her garden succeed as I am my own.
If you’re interested in getting something growing this spring, my recommended first step: pick up a copy of Grow Great Grub. It can be devoured in a single evening and will motivate you, educate you, and help you to figure out what will work best in the space that you have. From there, just do it and watch it happen. These little plants amaze me more and more every day.


1 comment:
I can't wait to see all the great dishes you are going to be making out of these seedlings. Also, I do expect you to create some big delicious meal and then invite me over to share. No pressure!