If you live in New York City or delight in the world of food, there’s a good chance you’re familiar with the highly reputed Momofuku restaurants, including their Milk Bar confectionery. Momofuku’s Milk Bar is headed by pasty chef Christina Tosi, who has made a name for herself and her shop by utilizing offbeat techniques (steeping cereal in milk, making an ingredient of breakfast bowl remnants) and quirky flavor combinations (chocolate chip cookies packed also with butterscotch, pretzels, and potato chips) to create treats that are shocking, stunning, and totally crave-worthy. Their Crack Pie is said to be as addictive as its namesake, and their cakes are something to swoon over. I know this because I’ve done so many a time—without ever having taken a bite.
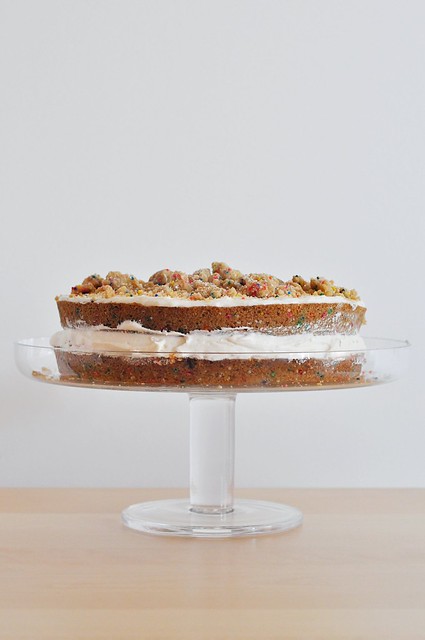
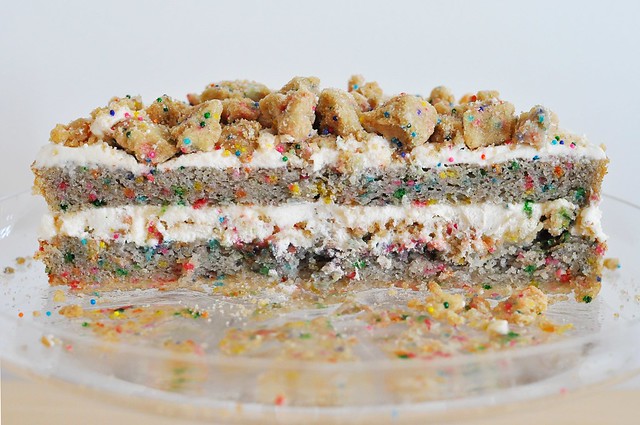
In the circle of Chris’ college friends (now our friends after all these years), Ryan and Megan most often host when we all get together. Megan and I share a love of cooking and good food—she’s yet to produce something from her kitchen that wasn’t completely fabulous—so it was no surprise to me when a Momofuku Milk Bar cake showed up on the dessert table at one of our gatherings. It was the Birthday Cake, a layered, funfetti-style vanilla cake, slathered between with frosting and topped with crumbs. It was nice to look at, yes, but the thing about this cake that nearly knocked me over was its smell.
It smelled like a boxed cake mix from some corner of my childhood, only a thousand times better. It encompassed everything your imagination could expect from leaning your nose straight into the very essence of a birthday cake. I couldn’t eat it, but I didn’t care. It was more than enough to smell the thing.

A their wedding last year, Ryan and Megan served an assortment of Milk Bar’s cakes for dessert. Chris loaded up his plate with a sampling, and I made sure that he grabbed a slice of the Birthday Cake. Then I made him wait so I could smell it before he dug in.
(Please reserve your judgments if I’ve made you uncomfortable with all my cake-sniffing. Once you’ve made it, you will understand.)
So, when Milk Bar came out with a cookbook last fall, it immediately went onto my holiday wish list. I had to adapt that cake so I could try it for myself, and, almost more importantly, I needed to know what it was that gave it that distinct aroma. (Many thanks to Ma for tucking it under the tree.)
And you know what the secret to this recipe is? Clear vanilla extract. Fake, nothing at all to do with real vanilla extract. Tablespoons of it. That and a ghastly amount of sugar.
This cake is actually four recipes, assembled. Believe it or not, my version is simplified in comparison. I know it looks overwhelming, but you really should make this cake at least once; it is honestly worth the labor. Don’t try to take it all on in a single go, though. Spreading the work out over two or three days makes it far more manageable.
In this incarnation, Momofuku’s Birthday Cake is both gluten-free and vegan—things you shouldn’t realistically expect to find at the actual bakery anytime soon. And while I can’t attest to how closely it resembles the original, I did serve it to Megan and the college friends and they all strongly approved. The fluffy, creamy frosting, especially, was a hit.
Make it for a big party or gathering. It’s so decadent that you probably won’t need more than a sliver, but your life will be just a little more complete once you’ve had a sniff taste.
Momofuku Milk Bar’s Birthday Cake
Adapted from the Momofuku Milk Bar cookbook
Serves 12
To tackle this delicious monstrosity, my recommendation is to make the crumbs one day and the cake the next. Make the frosting, cake soak, and do the assembly on the third; ideally, serve a day after assembling. Traditional measuring tools work fine here, but, since it is such a project, I would recommend using a kitchen scale if you have one handy. Full-disclosure: I used a mixture of volumetric and weight measurements as they were convenient. So truly, use whatever works best for you.
For the vanilla extract, Tosi suggests using McCormick, but I had fantastic results using Wilton. Both are available online. Also, I used Follow Your Heart’s vegan cream cheese in the frosting, but have heard good things about Tofutti as well.
If you have a sensitivity to soy, choose soy-free Earth Balance, palm shortening, and a non-dairy milk other than soy (I like coconut). Since most vegan cream cheeses are soy-based, choose a nut-based cream cheese like Dr. Cow or try replacing the amount called for with half Earth Balance and half shortening.
Bonus Creative Tip: Change up the color of the sprinkles to celebrate different occasions!
Birthday Cake Crumbs
¼ cup / 30 g millet flour
¼ cup / 30 g brown rice flour
¼ cup / 30 g potato starch
¼ teaspoon xanthan gum
½ teaspoon baking powder
½ cup / 100 g sugar
1 ½ tablespoons / 25 g brown sugar
½ teaspoon kosher salt
2 tablespoons rainbow sprinkles
¼ cup / 40 g grapeseed oil
1 tablespoon clear vanilla extract
Preheat the oven to 300 degrees. Line a baking sheet with parchment paper or a silpat.
In a medium bowl, whisk together the millet and brown rice flours, potato starch, xanthan gum, and baking powder. Add in the sugars, salt, and sprinkles and whisk to combine. Stir the grapeseed oil and vanilla extract into the flour mixture (use your hands if you find it easier), working until completely moistened and crumbs begin to form.
Transfer the crumbs the prepared baking sheet. Bake for 20 minutes, pausing halfway through to break them up a bit. The crumbs will become hard when cool, so avoid leaving very large chunks. Cool completely on the baking sheet. Crumbs can be stored in an airtight container at room temperature for a week, or up to a month in the refrigerator.
Birthday Cake
2 tablespoons flaxseed meal
6 tablespoons water
½ cup / 110 g unsweetened, unflavored non-dairy milk
1 ½ teaspoons white vinegar
½ cup / 60 g millet flour
½ cup / 60 g brown rice flour
½ cup / 60 g tapioca flour
½ cup / 60 g potato starch
1 teaspoon xanthan gum
1 3/4 teaspoons baking powder
¾ teaspoon kosher salt
¼ cup + 2 tablespoons rainbow sprinkles
4 tablespoons / 55 g Earth Balance buttery spread
1/3 cup / 60 g vegetable shortening
1 cup / 200 g granulated sugar
3 tablespoons / 50 g brown sugar
¼ cup / 28 g plain, unsweetened applesauce
1/3 cup / 65 g grapeseed oil
2 teaspoons clear vanilla extract
Preheat the oven to 350 degrees. Spray or brush two 9-inch round cake pans with oil, line the bottoms with rounds of parchment, and spray or brush once again with a little more oil.
Combine the flaxseed meal and the water in a small bowl and stir with a fork to combine. Set aside to allow it to form a viscous gel. If the flax meal has settled to the bottom a few minutes later, give it another stir with the fork to redistribute.
Stir the non-dairy milk and the vinegar together in a cup. Set aside. It will thicken slightly, like buttermilk.
In a medium bowl, whisk together the millet, brown rice, and tapioca flours, the potato starch, xanthan gum, baking powder, salt, and 1/4 cup of the sprinkles.
Using a stand mixture fitted with the paddle attachment (or a hand mixture and a large bowl), cream together the Earth Balance, vegetable shortening, and both sugars. Add the flax gel and the applesauce and beat to combine. Scrape down the bowl as needed. While mixing on low, stream in the non-dairy milk/vinegar mixture, the oil, and the vanilla. Continue to mix on medium-high until the batter is homogenous, thick, and voluminous, about 3 to 5 minutes. Turn the mixer back down to low and add the flour mixture, mixing just until combined. (If using a hand mixer, stir the flour into the wet mixture.)
Divide the batter evenly between the two prepared cake pans and sprinkle the remaining two tablespoons of sprinkles on the top of the batter. Bake for 30 minutes, until lightly browned and slighly firm when touched in the center. Allow cakes to cool completely. Store cakes, wrapped well in plastic (in or out of the pan), in the refrigerator for up to a week.
Birthday Cake Frosting
8 tablespoons / 115 g Earth Balance buttery spread
¼ cup / 50 g vegetable shortening
1/4 cup / 55 g vegan cream cheese
1 tablespoon plus 2 teaspoons / 30 g light corn syrup
1 tablespoon clear vanilla extract
1 ¼ cups / 200 g confectioner’s sugar
½ teaspoon kosher salt
1/8 teaspoon white vinegar
Pinch baking powder
Using a stand mixer fitted with a paddle attachment (or in a large bowl using a hand mixer), beat together the Earth balance, vegetable shortening, and cream cheese until light and fluffy. Slowly drizzle in the corn syrup and vanilla extract. Beat on medium-high for about 3 minutes, until smooth. Scrape the sides of the bowl as needed.
Add the confectioner’s sugar, salt, vinegar, and baking powder. Mix on low until incorporated and then increase the speed to medium-high and beat until the frosting is smooth, fluffy, and bright white, about 3 minutes. Frosting can be stored in the refrigerator for up to a week.
Birthday Cake Soak
¼ cup / 55 g unsweetened, unflavored non-dairy milk
1 teaspoon clear vanilla extract
In a small bowl, stir together the non-dairy milk and the vanilla.
Cake Assembly
Select one of the two cakes to use as your base layer and place it on a cake plate or stand. Using a pastry brush, brush the cake soak all over the cake (alternatively, use a spoon to drizzle and spread it).
Once the cake has absorbed the soak, spread 1/3 of the frosting on top, stopping at the edges. Next, sprinkle 1/2 of the crumbs evenly all over the frosting, pressing gently to level and adhere them. Spread another 1/3 of the frosting over the crumbs as evenly as possible.
Set the second cake on top of the frosting, pressing gently to secure it. Spread the remaining frosting all over the top of the cake and sprinkle with the rest of the crumbs.
The finished cake can be stored in the refrigerator for several days. Remove from the refrigerator and allow to stand at room temperature for at least half an hour before serving.